
Hosting is a consistent stumbling block that most beginners face when setting up a new Flask application, and in this article, we’ll help you overcome it step by step. Use this guide to learn the basics of developing and deploying a Flask app on the popular AWS and Heroku cloud application platforms.
Hire the best developers in Latin America. Get a free quote today!
Contact Us Today!Flask is a web application framework written in Python. Flask has many cool features like URL routing, a template engine, etc. These features let you develop web applications easily. The Flask framework is based on the Werkzeug WSGI toolkit and Jinja2 template engine. Both projects are maintained by a team of international Python enthusiasts called Poocco.
AWS (Amazon Web Services) provides information technology infrastructure services to businesses in the form of web services. Its products and solutions include cloud computing, compute, networking, storage and content delivery, databases, analytics, application services, deployment and management, gaming, digital media, as well as backup and recovery services. AWS is based in Seattle, Washington, United States and it has data center locations spread across the United States, Europe, Brazil, Singapore, Japan, Africa, and Australia.
Heroku is a container-based cloud Platform as a Service (PaaS). Developers use Heroku to deploy, manage, and scale modern applications. It uses language-specific build packs and is thus able to host applications written in any language. Heroku was first deployed in 2007 and it has since grown to be a key player in the cloud industry, today offering a wide range of products and services.
In this guide, you’ll learn how to:
- Create a simple Flask web application
- Deploy the Flask web application on AWS
- Deploy the Flask web application on Heroku
This guide assumes that you understand the basics of Flask web development and that you have some experience using Git.
Prerequisites
Table of Contents
- Prerequisites
- Deploying Flask to AWS
- Steps
- Step 1—Create your AWS Account
- Step 2—Install the AWS Elastic Beanstalk CLI
- Step 3—Create a Python Virtual Environment
- Step 4—Deploy your Flask App to AWS EB
- Step 5—Cleanup
- Deploying Flask on Heroku
- Steps
- Step 1—Sign-up for a Heroku Account
- Step 2—Install the Heroku CLI
- Step 3—Create a Python Virtual Environment
- Step 4—Create your Flask Application
- Step 5—Prepare your Flask Application for Deployment
- Step 6—Setup your Application’s Git Repository
- Step 7—Create a Heroku Application
- Step 8—Deploy your Flask Application to Heroku
- Step 9—Cleanup
- Conclusion
Prerequisites
Before starting this guide, you should have:
- Git installed on your system. If not already installed you can download git from the Git downloads page.
- Python 3.7 or later installed on your system. We recommend that you install Python using the pyenv Python version manager. Alternatively, you can download Python from the Python downloads page.
- Access to a command line terminal or shell to run commands. On Linux and macOS, you can use your preferred shell and package manager. On Windows 10, you can install the Windows Subsystem for Linux to get a Windows-integrated version of Ubuntu and Bash.
Deploying Flask to AWS
The following steps demonstrate the basic developer flow for creating a Flask web application and hosting it on AWS’s Elastic Beanstalk service. Elastic Beanstalk is a service for deploying and scaling web applications and services. When you push your code, Elastic Beanstalk automatically handles the end-to-end deployment—from capacity provisioning, load balancing, auto scaling, down to application health monitoring.
Steps
Step 1—Create your AWS Account
We are assuming that you do not have a pre-existing AWS account with Amazon (in case you do then please feel free to skip this section). Amazon Web Services (AWS) provides a 12-month limited fully functional free account which can be used to learn the different components of AWS. With this account, you get access to many services provided by AWS although there are some services that are unavailable on the free-tier. To create an AWS account:
- Open the following URL:

- Click on the Create a Free Account button.
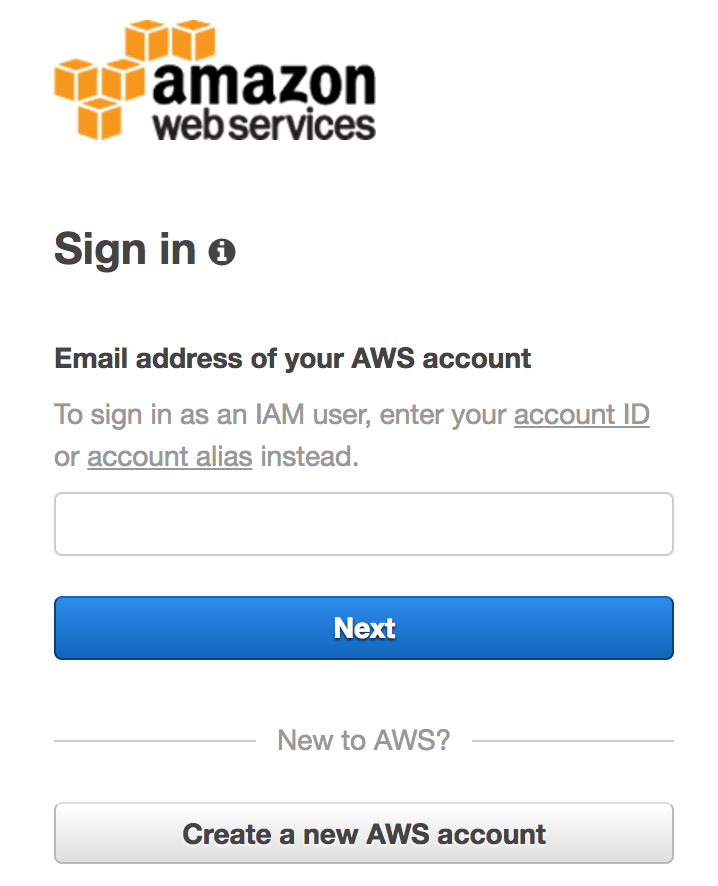
- On the subsequent screen Click on Create a new AWS Account button:
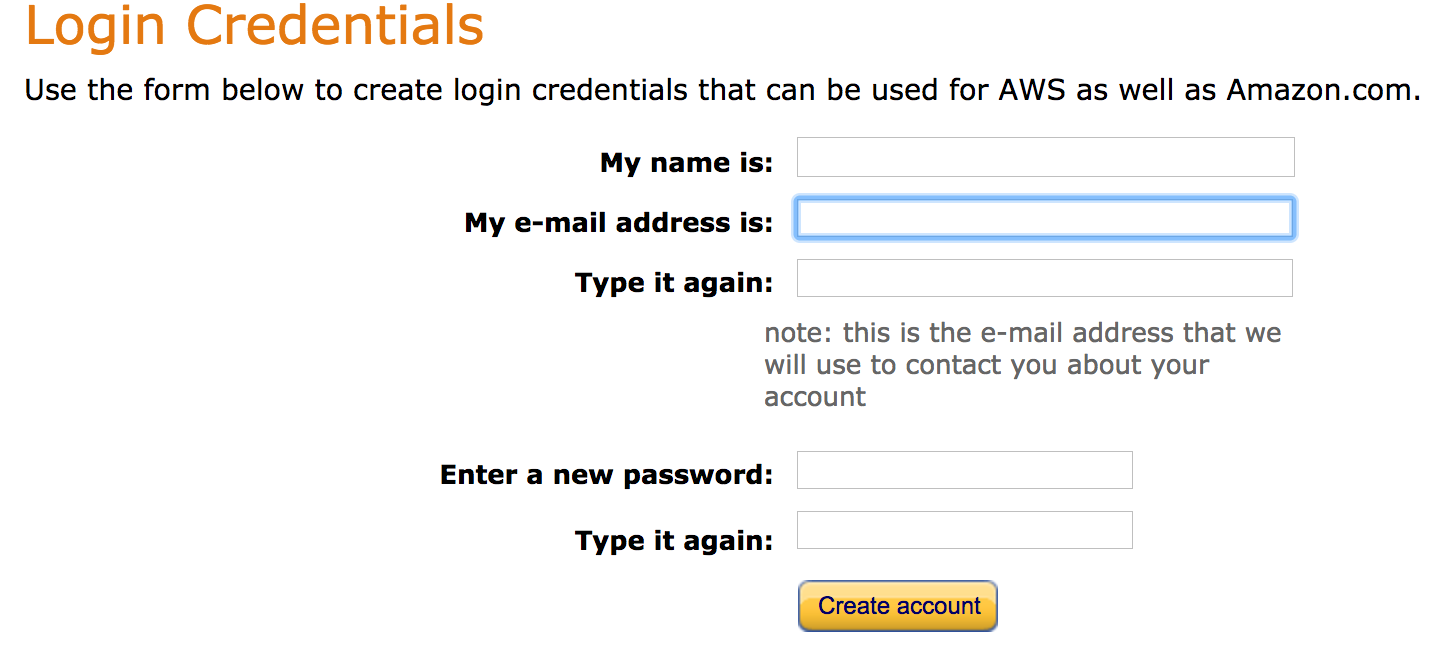
- A series of intuitive screens will then guide you through the process of creating an AWS account. On the first screen, you’ll be prompted to provide your name, email address, and a password in a form. Fill in the form and click on the Create account button to proceed to the next step:
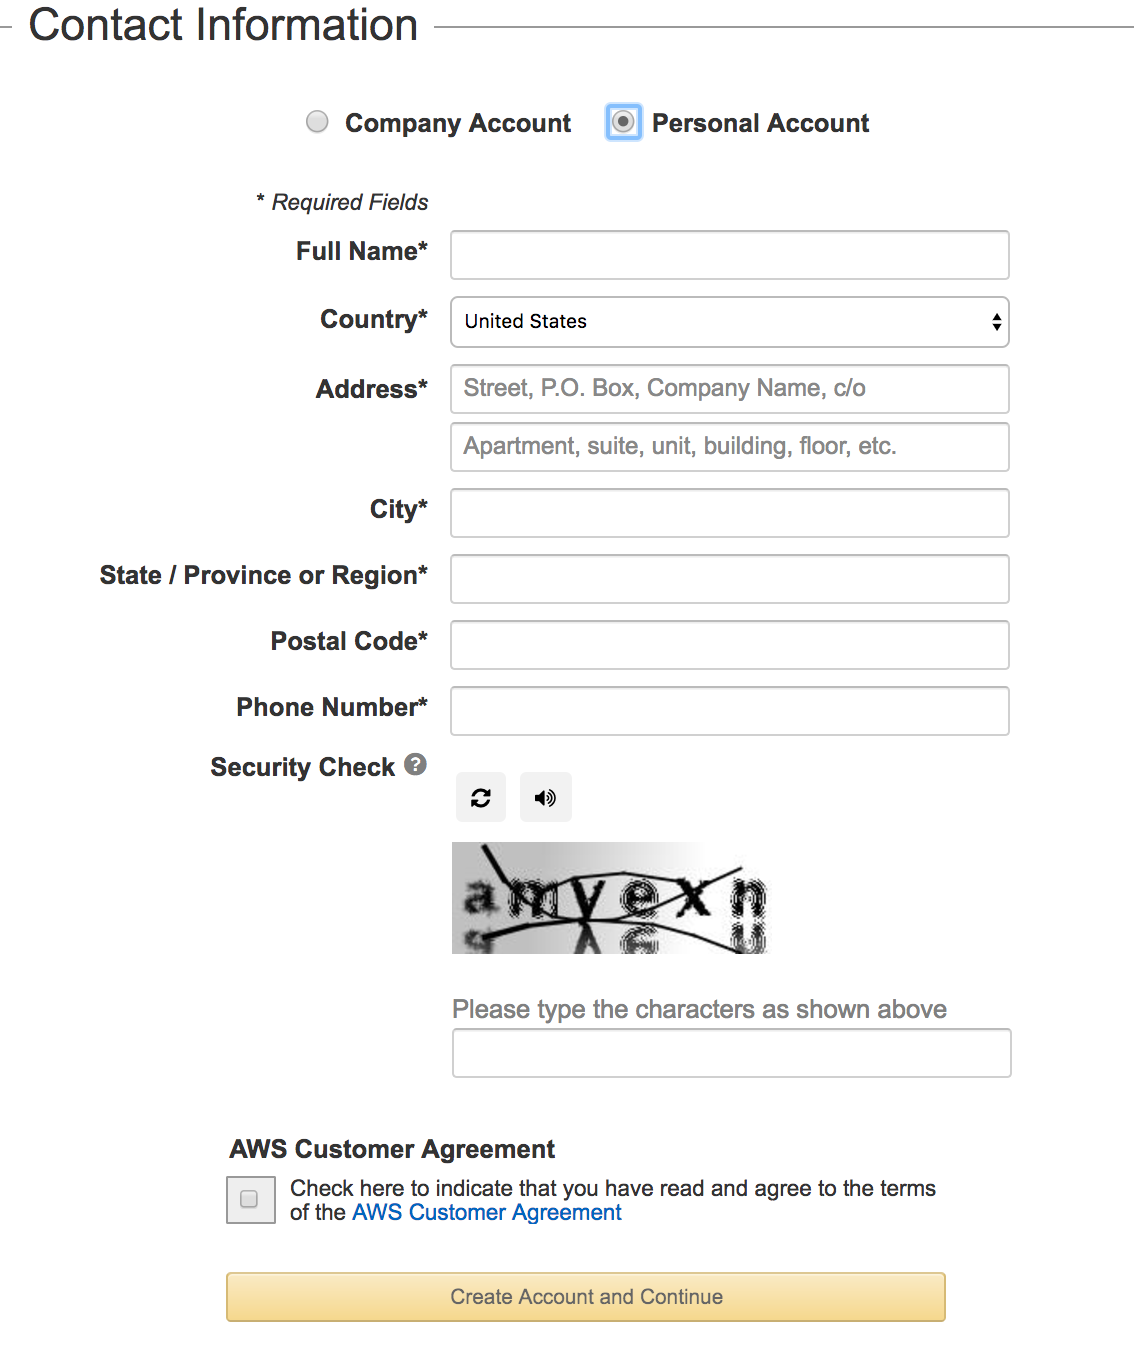
- In the subsequent screen, you’ll need to provide the Contact Information details as requested in the form shown below. Select the Personal Account for your initial learning purposes and verify the CAPTCHA. Amazon uses this information for billing and invoicing.
- Next, provide your payment information in the form as shown in the following screenshot. When creating an AWS account, you are required to enter your name as well as your Credit/Debit card details. Amazon will execute a $1 transaction against the card to confirm its validity:

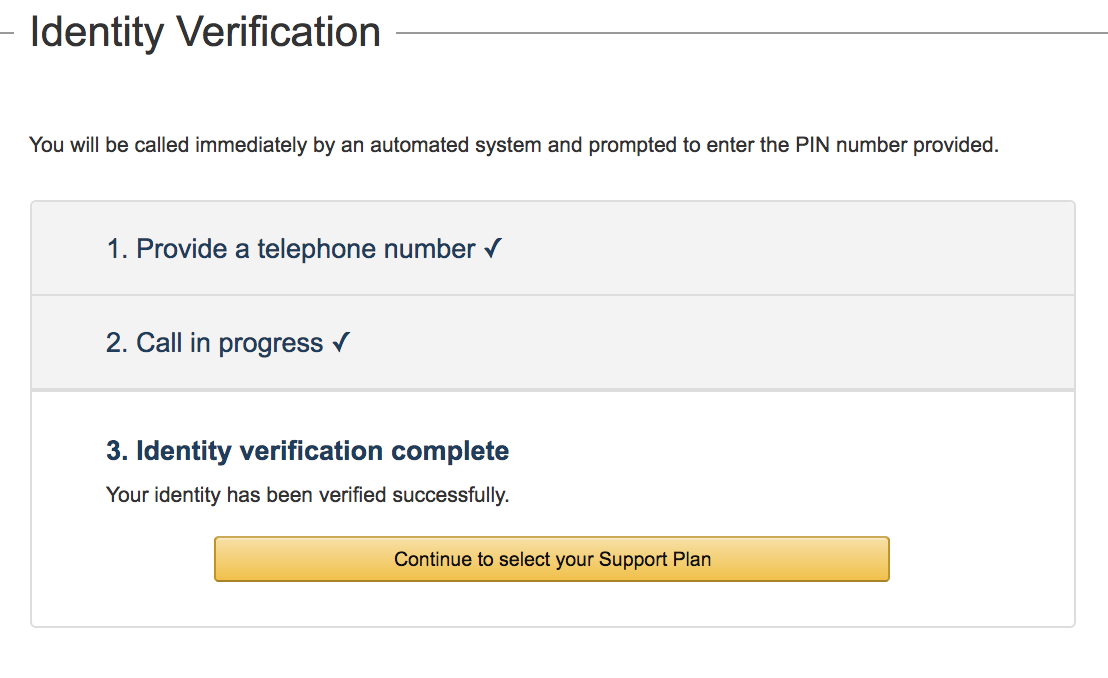
- Next, Amazon executes an identity verification step. It includes a call back via an automated system to verify your telephone number. You will also need to enter a four digit PIN (displayed on your screen) when prompted. After the verification process is completed, click on Continue to select your Support Plan button:
- You can subscribe to one of: Basic, Developer, Business, or Enterprise support plans. We recommend subscribing to the Basic plan at this stage. This plan is free and ideal for learning purposes while the other plans are more suitable for production accounts. Click on Continue to proceed to the next step:

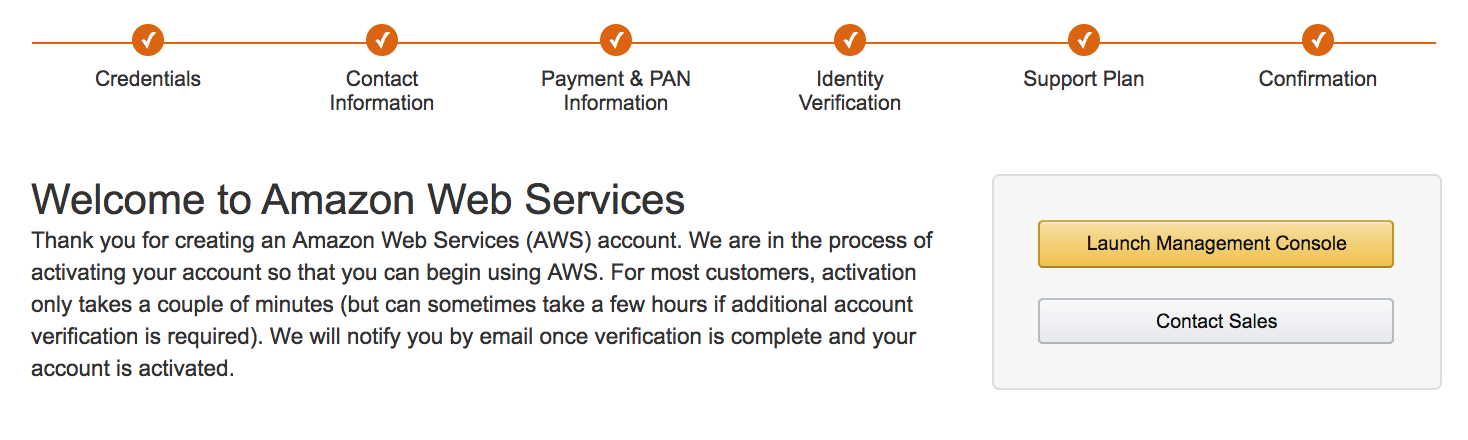
- At the Confirmation stage, you have completed all the steps requiring your input for setting up an AWS account. Click on Launch Management Console:
- At this stage, you have successfully created an AWS account, and you are ready to start using the various AWS services. Click on the Sign-in to the Console button to log into your account.
- After logging in successfully, the AWS management console dashboard will be displayed as follows:
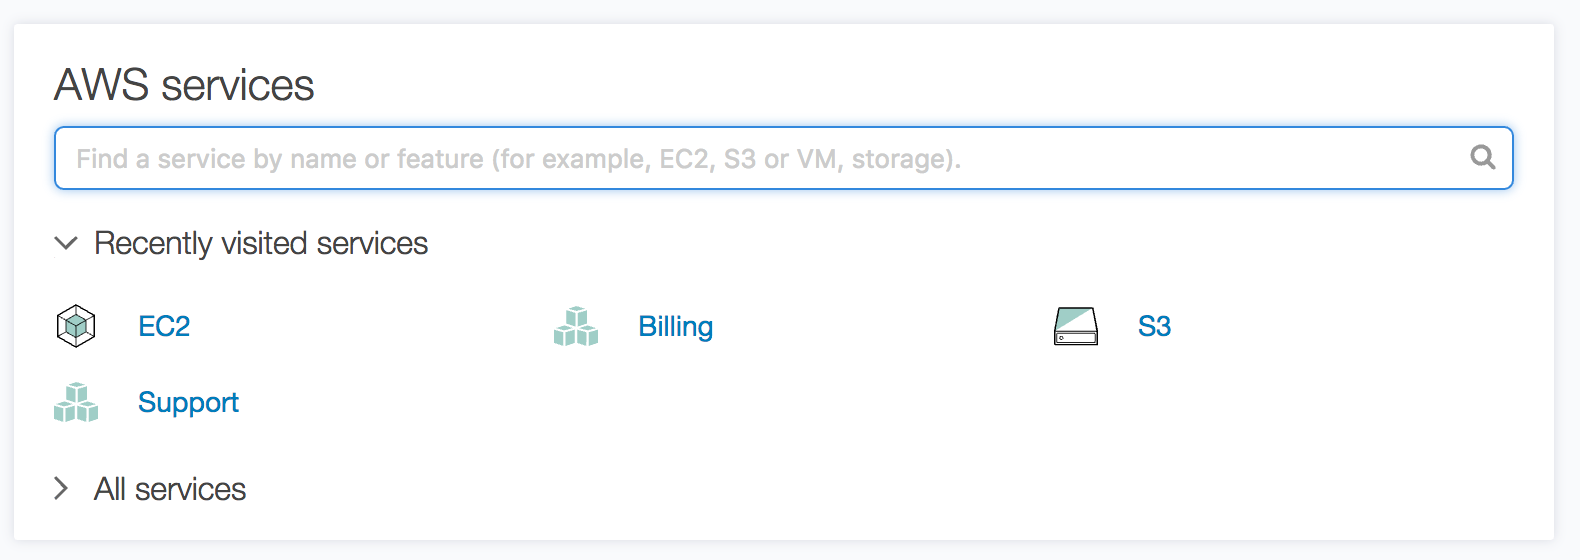
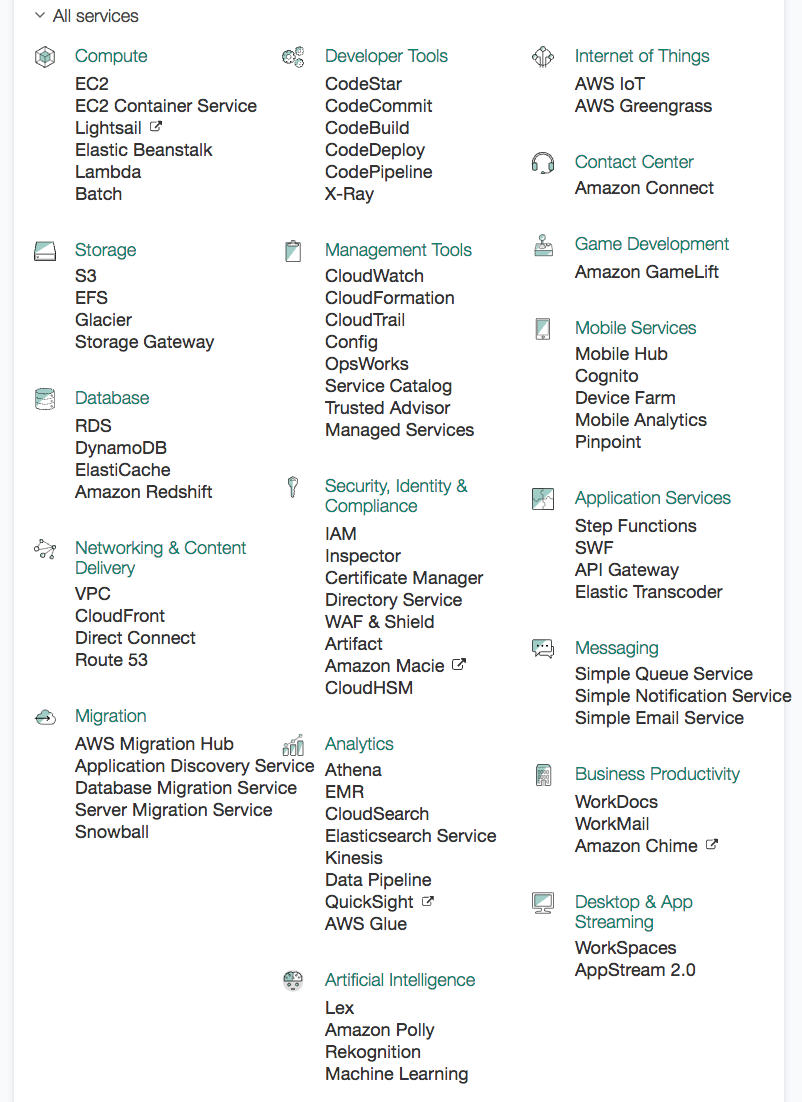
- Click on All services to expand the display and view the list of all the AWS services. Clicking on any one of these services will redirect you to the dashboard for the selected service:
Step 2—Install the Elastic Beanstalk (EB) CLI
- Clone the following repository on your local machine:
$ git clone https://github.com/aws/aws-elastic-beanstalk-cli-setup.git- Install/Upgrade the EB CLI
- MacOS/Linux On Bash or Zsh:
$ python ./aws-elastic-beanstalk-cli-setup/scripts/ebcli_installer.py- Windows in PowerShell or in a Command Prompt window:
$ python .\aws-elastic-beanstalk-cli-setup\scripts\ebcli_installer.pyAfter installation on Linux and macOS, the output contains instructions on how to add the EB CLI (and Python) executable file to the shell’s $PATH variable, if it isn’t already in it.
Step 3—Creating a Python Virtual Environment
In this step, you’re going to set up a virtual environment that will help you isolate the Flask application from the other Python files on your system.
- Start by installing the python3-venv package, which will install the venv module:
$ sudo apt install python3-venv- Next, create a parent directory for your Flask project.
$ mkdir ~/awsproject- Move into the directory with the cd command:
$ cd ~/awsproject- Create a virtual environment to store your Flask project’s Python environment requirements by typing:
$ python3 -m venv awsprojectenvThis will install a local copy of Python and pip into a directory called awsprojectenv within your project directory.
- Before installing applications within the virtual environment, you need to activate it. Do so by typing:
$ source awsprojectenv/bin/activateYour prompt will change to indicate that you are now operating within the virtual environment. You will see (awsprojectenv) prepended to your command prompt, indicating that you’re in a virtual environment, for example: (awsprojectenv)user@host:~/awsproject$.
Step 4 — Setup a Flask Application
Now that you are in your virtual environment, you can get started on building a Python application using the Flask microframework.
- First, install wheel with the local instance of pip to ensure that your packages will install even if they are missing wheel archives:
$ pip install wheel- Next, install Flask:
$ pip install flask==2.0.3- View the installed libraries with pip freeze:
         $ pip freeze
           click==8.1.1
           Flask==2.0.3
           itsdangerous==2.1.2
           Jinja2==3.1.1
           MarkupSafe==2.1.1
           Werkzeug==2.1.0
This command lists all of the packages installed in your virtual environment. Because you are in a virtual environment, globally installed packages like the EB CLI are not shown.
- Save the output from pip freeze to a file named requirements.txt.
$ pip freeze > requirements.txtThis file tells Elastic Beanstalk to install the libraries during deployment.
- Now that you have Flask available in your environment, let’s create a simple Flask application. To reduce the number of new moving parts in your application, we’ll only worry about creating the simplest of Flask apps. The lesser the complexity, the fewer the dependencies, and thus, the fewer the conflicts. Create a new text file in this directory named app.py and paste the following code:
     from flask import Flask
     app = Flask(__name__)

     @app.route("/")
     def hello_world():
         return "<h1 style='color:green'>Hello World!</h1>"

     if __name__ == "__main__":
         app.run(host='0.0.0.0')
Flask is a microframework that exists as a Python module. The example above will import the Flask module and instantiate a Flask object. You can use this to define the functions that should be run when a specific route is requested.
- Save and close the file when you’re done.
- Now you can test your Flask app by running the following command:
$ python app.py- You will see output like the following, including a helpful warning reminding you not to use this server setup in production:
     * Serving Flask app "myproject" (lazy loading)
      * Environment: production
        WARNING: Do not use the development server in a production environment.
        Use a production WSGI server instead.
      * Debug mode: off
      * Running on http://0.0.0.0:5000/ (Press CTRL+C to quit)
- Open http://127.0.0.1:5000/ in your web browser to view your web application.
When you are finished, hit CTRL-C in your terminal window to stop the Flask development server.
If you got debug output instead, fix the errors and make sure the application is running locally before proceeding to the next steps.
Step 5—Deploy your Flask app to AWS
You now have everything you need to deploy your application on AWS Elastic Beanstalk. Your project directory should now look like this:
 ~/awsproject/
├── awsprojectenv
├── app.py
└── requirements.txt
- The
awsprojectenvfolder is not required for the application to run on Elastic Beanstalk. When you deploy, Elastic Beanstalk creates a new virtual environment on the server instances and installs the libraries listed inrequirements.txt. To minimize the size of the source bundle that you upload during deployment, add an.ebignorefile that tells theEB CLIto leave out the awsprojectenv folder. Create a new text file in this directory named.ebignorewith the following contents:
awsprojectenv- Next, initialize your
EB CLIrepository with theeb initcommand:
$ eb init -p python-3.7 flask-app --region us-west-2Output:
Application flask-app has been created.
This command creates a new application named flask-app and configures your local repository to create environments with the latest Python 3.7 platform version.
- Run
eb initagain to configure a default keypair so that you can connect to the EC2 instance running your application withSSH:
$ eb init
Select a key pair if you have one already, or follow the prompts to create a new one.
- Create an environment and deploy your application to it with
eb create:
$ eb create flask-envEnvironment creation takes about 5 minutes and creates the following resources:
- An Amazon Elastic Compute Cloud (Amazon EC2) instance configured to run web applications on your programming platform of choice.
- An Amazon EC2 security group configured to allow inbound traffic on
port 80. - An Elastic Load Balancer configured to distribute requests equally to all the instances running your application.
- An Auto Scaling group configured to replace any instance that is terminated or unavailable.
- An Amazon S3 storage bucket for storing your source code, logs, and other artifacts that are created when you use Elastic Beanstalk.
- Two CloudWatch alarms that monitor the load on the instances in your environment and that are triggered if the load is too high or too low.
- A domain name that routes to your web application in the following format:
subdomain.region.elasticbeanstalk.com.
- When the environment creation process completes, open your web site with
eb open:
$ eb openThis will open a browser window using the domain name created for your application. You should see the same Flask website that you created and tested locally.
Step 5—Cleanup
Once you get to this point, you can terminate all the AWS resources that you provisioned in your environment, (i.e.) Amazon EC2 instances, database instances, load balancers, security groups, and alarms.
To terminate your Elastic Beanstalk environment, run the following command:
$ eb terminate flask-envDeploying Flask to Heroku
In this section, you’ll create a Python Flask example application and deploy it to Heroku, making it publicly available on the web. Heroku removes much of the infrastructure burden related to building and running web applications, allowing you to focus on creating awesome applications. Some of the abstractions handled by Heroku include:
- Provisioning HTTPS certificates
- Managing DNS records
- Running and maintaining servers
Throughout the rest of this section, you’ll learn how to deploy the previously created web application to the internet using Heroku. By the end of this section, your application will be publicly available under a nice URL and served using HTTPS.
Steps
Step 1—Create a Heroku Account
Heroku, being a Software as a Service (SaaS) offering, requires you to create an account and login before you can start using its platform. Therefore, before we get started, you should first sign-up for a Heroku account. You can create an account at this URL:
Step 2—Install Heroku CLI
The Heroku Command Line Interface (CLI) lets you create, manage and scale applications, provision add-ons, view your application logs, and run your application locally directly from the terminal. It’s an essential part of using Heroku.
Install the appropriate version of the Heroku CLI for your respective OS as follows:
Windows:
Download the appropriate installer for your Windows installation:
macOS:
$ brew tap heroku/brew && brew install herokuLinux:
$ curl https://cli-assets.heroku.com/install.sh | shTo verify your CLI installation, use the heroku –version command:
$ heroku --versionOutput:
The output looks like heroku/x.y.z.
After you install the CLI, run the heroku login command. Enter your login credentials to complete login.
$ heroku login -i
heroku: Enter your login credentials
Email: me@example.com
Password: ***************
Two-factor code: ********
Logged in as me@heroku.com
The CLI logs you in automatically and saves your email address. An API token to ~/.netrc for future use.
Step 3—Create a Python Virtual Environment
In this step, you’ll set up a virtual environment that will isolate the Flask application from the other Python files on your sysystem.
- If not already installed, install the
python3-venvpackage, which will install thevenvmodule:
$ sudo apt install python3-venv- Next, create a parent directory for your Flask project.
$ mkdir ~/herokuproject- Move into the directory with the cd command after you create it:
$ cd ~/herokuproject- Create a virtual environment to store your Flask project’s Python requirements by typing:
$ python3 -m venv herokuprojectenvThis will install a local copy of Python and pip into a directory called herokuprojectenv within your project didirectory.
- Before installing applications within the virtual environment, you need to activate it. Do so by typing:
$ source herokuprojectenv/bin/activateYour prompt will change to indicate that you are now operating within the virtual environment. You will see (herokuprojectenv) prepended to your command prompt, indicating that you’re in a virtual environment. something like this: (herokuprojectenv)user@host:~/herokuproject$.
Step 4 — Create your Flask Application
Now that you are in your virtual environment, it’s time to prepare a simple Flask application for deployment, i.e. one that consists of just app.py.
- First, install wheel with the local instance of pip to ensure that your packages will install even if they are missing wheel archives:
$ pip install wheel- Next, install Flask in your environment:
$ pip install flask==2.0.3- Install the gunicorn web server. Whenever we run
python app.pyfrom our command-line, we’re running the default webserver that comes with Flask. However, Heroku seems to prefer a web server called gunicorn. Just so that we can follow along with Heroku’s documentation, let’s install gunicorn on our own system. It’s a Python library like any other and can be installed withpip:
$ pip install gunicorn- Check the installed libraries with pip freeze:
     $ pip freeze
       click==8.1.1
       Flask==2.0.3
       itsdangerous==2.1.2
       Jinja2==3.1.1
       MarkupSafe==2.1.1
       Werkzeug==2.1.0
       gunicorn==20.0.1
This command lists all of the packages installed in your virtual environment. Because you are in a virtual environment, globally installed packages like the Heroku CLI are not shown.
- Save the output from
pip freezeto a file namedrequirements.txt.
$ pip freeze > requirements.txtThis file tells Heroku to install the libraries during deployment.
- Now that you have Flask available in your environment, let’s create a simple Flask application. To reduce the number of moving parts in your application, we’ll only worry about creating the simplest of Flask apps. The lesser the complexity, the fewer the dependencies, and thus, the fewer the conflicts. Create a new text file in this directory named
app.pyand paste the following code:
     from flask import Flask
     app = Flask(__name__)

     @app.route("/")
     def hello_world():
         return "<h1 style='color:green'>Hello World!</h1>"

     if __name__ == "__main__":
         app.run(host='0.0.0.0')
The example above will import the Flask module and instantiate a Flask object. You can use this to define the functions that should be run when a specific route is requested.
10. Save and close the file when you’re finished.
11. Now you can test your Flask app by running the following command:
$ python app.py12. You will see the following output, including a helpful warning reminding you not to use this server setup in production:
Output:
      * Serving Flask app "myproject" (lazy loading)
       * Environment: production
         WARNING: Do not use the development server in a production environment.
         Use a production WSGI server instead.
       * Debug mode: off
       * Running on http://0.0.0.0:5000/ (Press CTRL+C to quit)
13. Open http://127.0.0.1:5000/ in your web browser to view your web application.
When you are finished, hit CTRL-C in your terminal window to stop the Flask development server.
If you got debug output instead, fix the errors and make sure the application is running locally before proceeding to the next steps.
Step 5—Prepare your Flask Application for Deployment
With Heroku, we have to include some metadata with our application code, so that Heroku knows how to set up a compatible webserver and install the software that our application needs.
- The first step is to specify the Python Version with runtime.txt so that Heroku knows to use the Python version that we’re using on our own computer to develop our app. To do so, from your CLI, run the Python interpreter with the
--versionflag to reveal which version of Python you are running:
     $ python --version
Python 3.7.1 :: Anaconda 2.5.0 (x86_64)- Next, create runtime.txt in your root app folder and add just the single line (note: replace my example version number with yours, if it is different):
python-3.7.1- Heroku also needs a file to tell it how to start up the web app. By convention, this file is just a plaintext file that is named: Procfile located in the root directory of your application. A Procfile defines process types and explicitly declares what command should be executed to start your app. Since this is a simple app, Procfile will contain just this line:
web: gunicorn app:app --log-file=-- Add a
.gitignorefile to prevent unwanted files from being pushed up to Heroku Git repo (or any git repo) later on. Create a new file named.gitignoreand copy the contents of the example.gitignorefile here:
https://github.com/github/gitignore/blob/master/Python.gitignore
- Before deploying your app to Heroku, you’ll want to test it on your own system again. However this time, instead of using python app.py, use the Heroku toolbelt subcommand, local:
$ heroku local webThe command creates an app at http://localhost:5000, which should work like before when you ran python app.py.
Step 6—Setup your App’s Git Repository
So by now our simple Flask app folder contains this file structure:
   ~/herokuproject/
  ├── .gitignore
  ├── herokuprojectenv
  ├── Procfile
  ├── app.py
  ├── requirements.txt
  └── runtime.txt
We need to set up a git repo for this project because Heroku deploys using git—which is not to be confused with GitHub or GitLab. Basically, this means before we can deploy to Heroku, we need to create a git repo in our app, add the files, and commit them. But we don’t need to push them onto a GitHub repo if we don’t want to.
In fact, for this basic app, don’t bother making a GitHub repo. Just make a local git repo:
$ git init$ git add .$ git commit -m 'first'Step 7—Create a Heroku Application
OK, now Heroku has all it needs to provision a server for our application.
Now we need to tell Heroku to initialize an application via its create command. Create an app on Heroku, which prepares Heroku to receive your source code:
$ heroku createCreating app... done, ⬢ serene-caverns-93825
https://misty-caverns-93825.herokuapp.com/ | https://git.heroku.com/misty-caverns-93825.gitWhen you create an app, a git remote (called heroku) is also created and associated with your local git repository.
Heroku generates a random name (in this case misty-caverns-93825) for your app, or you can pass a parameter to specify your own app name.
That output tells us two things:
- Our application can be visited at: https://misty-caverns-93825.herokuapp.com/
- Heroku has git repo at the url https://git.heroku.com/misty-caverns-93825.git. In fact, the create command has helpfully set up a remote named heroku for us to push to. A .git remote (called heroku) is also created and associated with your local git repository.
Step 8—Deploy your Flask Application to Heroku
Finally it’s time to push your Flask code to Heroku.
- Start by running the following command that tells Heroku that you want to deploy your currently committed code by doing a git push to heroku master:
$ git push origin masterThis should seem familiar to when you’ve pushed code to your Github account, but targeting origin master. We haven’t actually created a Github git repo for our simple app—we’ve only created a local repo.
- By running heroku create, we also created a repo on Heroku which we will now push to:
$ git push heroku masterAnd with that simple command, Heroku will go through the steps of taking our application code, installing the dependencies we specified in requirements.txt and runtime.txt, and then starting a webserver as specified in Procfile. After about 30 seconds, you’ll get output telling you how to find your application on the web.
- To view the app, run the following command:
$ heroku openEt voilà! You now have a functioning Python + Flask application deployed on Heroku.
Step 9—Cleanup
To delete the deployed version of your app and the reserved URL—but not your local code—you can use the apps:destroy subcommand:
$ heroku apps:destroy whatever-yourappnameis-12345Conclusion
Do you have any questions or got stuck at any part of the process? Please leave a comment below and I will help you out. I hope this guide has been clear enough so now you can up and running deploying a bunch of Flask apps on AWS and Heroku! Happy coding!